Showing posts with label tutorial. Show all posts

20130527

How to make Ice Cream Cone Cupcakes

Happy Memorial Day!

Here is a super fun cooking post on how to make ice cream cone cupcakes. Although I wish I was the next Rachel Ray, I definitely am not anywhere close to being a chef. This recipe is for those who love baking sweets, without all the hassle of making everything from scratch, taking the whole day to cook, etc. I actually made a post on how to make these cupcakes last year, but decided to do another one because my new camera delivers way better pictures. It is super easy and fun to eat. Bon appetit!

How to bake Ice cream cone cupcakes! 
how to make ice cream cone cupcakes
You will need: cake mix, frosting, ice cream cones, and any toppings you want. 

how to make ice cream cone cupcakes
1. Set up your cones. You can either use a cupcake pan, or create this make-shift holder by puncturing holes into a sheet of aluminum foil.
how to make ice cream cone cupcakes
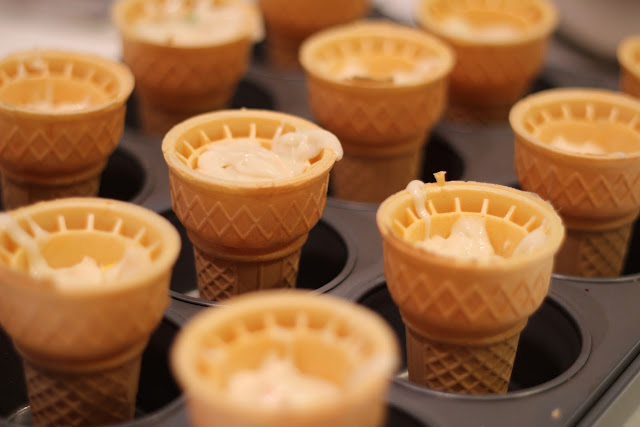
2. Prepare the cake mix as instructed on the box. Fill in the ice cream cones almost to the top.

3. Bake at 350 degrees Farenheit for about 25 minutes. Adjust the baking time if needed, until the top turns a little golden.


4. Frost! TIP: Wait until the cupcake cools before frosting, otherwise it will melt along the sides!
how to make ice cream cone cupcakes
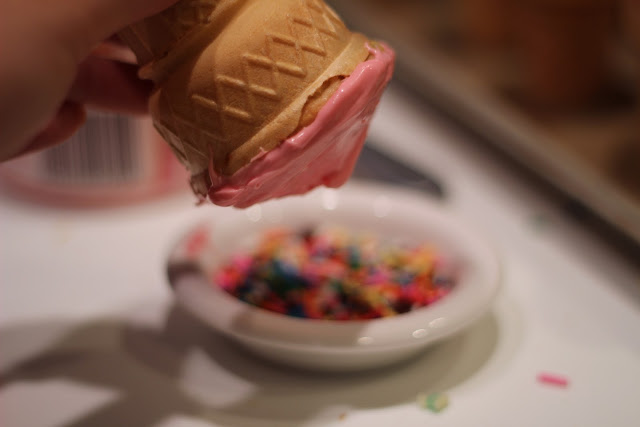
5. Dip the frosting gently into a bowl of sprinkles.
how to make ice cream cone cupcakes


Ice cream cone cupcake
6. Eat and enjoy!
how to make ice cream cone cupcakes

This recipe is my go-to treat for any party or event. Try it out, and let me know what you think!

xo, Dahye

20130323

DIY Flower Crown

 Hey everyone!

Here is another super fun and easy DIY post on how to make your own flower crown/headband. Technically, it's a headband but calling it a crown makes it sound more special. I was inspired by Connie (Kisforkani.com) and Bonnie (Flashesofstyle.blogspot.com). They both have amazing style, and often rock these flower headpieces. And what a coincidence, they have similar names!! So, here is how you can make your own. This is the perfect rainy-day project as it costs under $5, and takes about 15 minutes to make. Enjoy!

DIY Flower crown. Simple and easy to make!

Materials:  - Fake flowers. I got mine from the Dollar store.
                 - Simple headband. I used ones I already had laying around.
                 - Hot glue gun
                 - Scissors

 
1. Cut the flowers off the stem. Try to make it as flat as possible. 


 2. Use your hot glue gun, and glue the flower onto the headband. Start from the middle and work your way out.


 3. Repeat step 2 until all of the flowers are glued on.


4. Let it dry, and you are done!

DIY flower crown tutorial by heydahye
 White floral jumper, American Apparel____Pink floral jumper, Ebay

I love how these turned out, and am so excited to wear them. I think they are going to look awesome for music festivals and other such summer festivities.

Hope you liked this DIY, and let me know if you tried it out! Have a nice weekend.


Follow via Bloglovin'

20130221

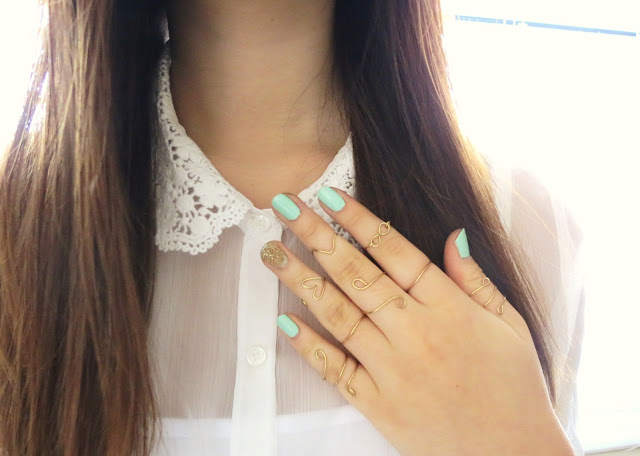
DIY Dainty Knuckle Rings

Hey everyone!

Here is a DIY post on how to make dainty rings. I've been seeing this trend on many of my favorite bloggers, like Rumi and Jules. They can be sized to your own fingers, and I made some for both my top and bottom knuckles. I've been wanting to try this project for a while, and I'm so glad I got around to it during my day-off! I hope the steps will be clear.

DIY how to make knuckle rings wire easy

DIY how to make knuckle rings wire easy
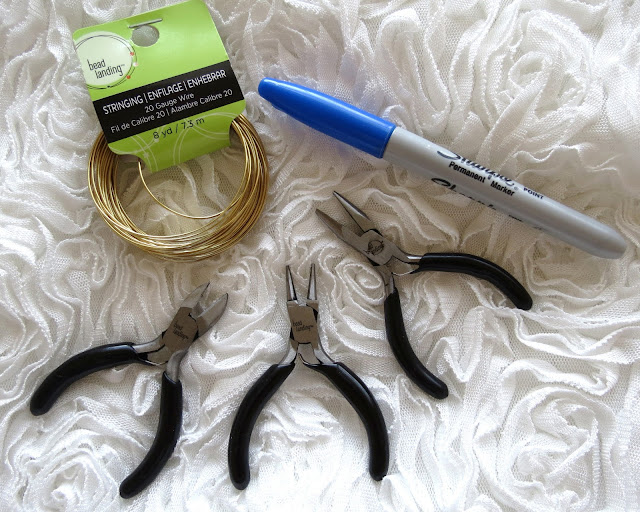
 Supplies: - 20 gauge wire
               - Side cutters to cut wires
               - Round nose pliers to bend and shape wires
               - Chain nose pliers to bend and shape wire
               - Any cylindrical item to wrap the wire around. You can use a marker, lipstick, pencil, etc.

DIY how to make knuckle rings wire easy
 Step 1: Use the side cutters and cut a 3 inch long piece of wire. 

DIY how to make knuckle rings wire easy
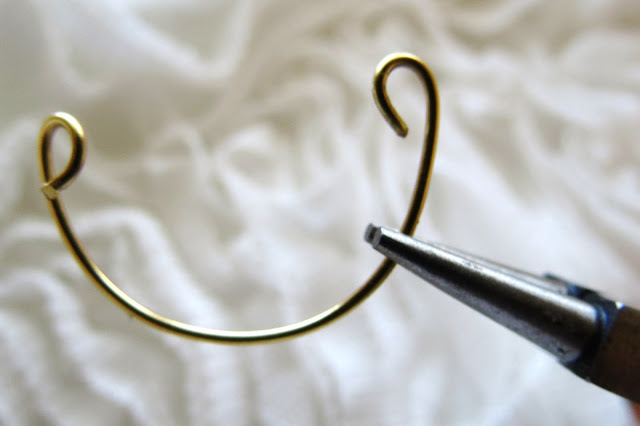
 Step 2: Wrap the wire around the marker, to make it into a ring shape. Use the round nose pliers to bend the end of the wire inwards. You have to do this for every ring because the end of the wire is very pokey!

 To make a heart ring: Bend the end of the wire the opposite direction. 

 Bend it again the other way to make a wave-like shape. 

DIY how to make knuckle rings wire easy
 Then, bend it again to complete the heart shape. Making these rings is all about creating the shapes are you want it, so the steps are pretty vague!

DIY heart ring
 Again, bend the end of the ring inwards and wrap around a marker to shape it as a ring. 

DIY how to make knuckle rings wire easy
 To make an infinity ring: Start with one inwards bend at the end of the wire. 

 Loop around the wire to make the shape of an "8."

 Here is your infinity shape!

 Cut the extra wire off. 

DIY how to make knuckle rings wire easy
 Cut a short piece of wire and bend in both ends. 

DIY how to make knuckle rings wire easy
 Gently hook on the infinity shapes onto both ends. 

DIY infinity ring
 Super cute infinity ring! This would be a great hand-made gift.

DIY knuckle rings. You can make all sorts of shapes, personalize them to your taste!

DIY how to make knuckle rings wire easy

 It's kind of hard to see, but I also made a little ear cuff for my cartilage. 

DIY how to make knuckle rings wire easy

DIY how to make knuckle rings wire easy


 I love my statement pieces, but I think these minimal rings add just enough shine and girly-ness. The only down side is that the rings tend fall off because the wire bends so easily.

Hope you enjoyed this DIY, and let me know if you try it out. :)

p.s. Here are some cute and ready-made options from the web:


Follow via Bloglovin'
Like on Facebook
Instagram @heydahye

Hey Dahye ALL RIGHTS RESERVED © Revel and Design - Powered by Blogger