Here is a DIY post on how to make dainty rings. I've been seeing this trend on many of my favorite bloggers, like Rumi and Jules. They can be sized to your own fingers, and I made some for both my top and bottom knuckles. I've been wanting to try this project for a while, and I'm so glad I got around to it during my day-off! I hope the steps will be clear.
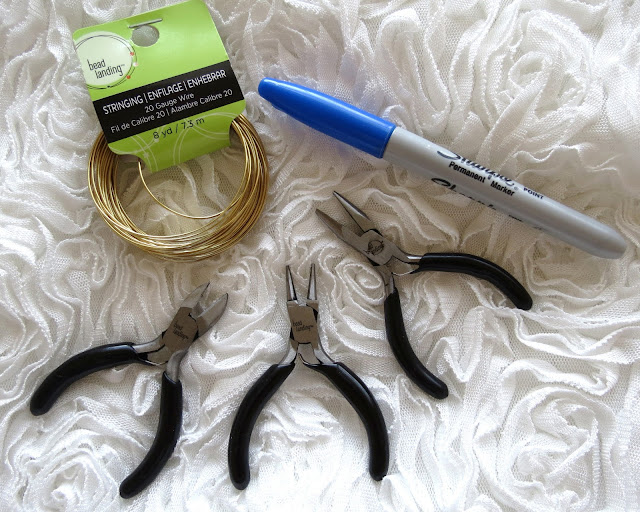
Supplies: - 20 gauge wire
- Side cutters to cut wires
- Round nose pliers to bend and shape wires
- Chain nose pliers to bend and shape wire
- Any cylindrical item to wrap the wire around. You can use a marker, lipstick, pencil, etc.
Step 1: Use the side cutters and cut a 3 inch long piece of wire.
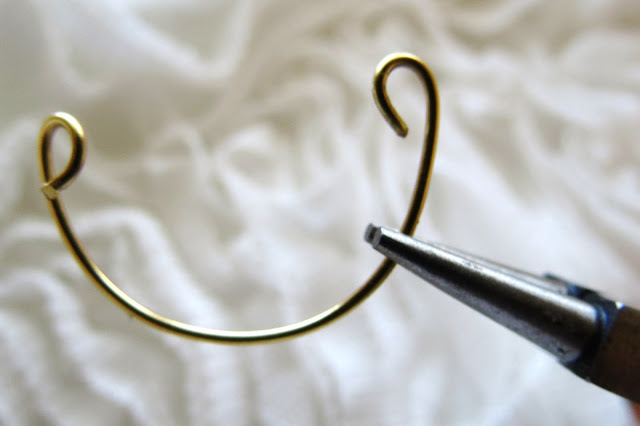
Step 2: Wrap the wire around the marker, to make it into a ring shape. Use the round nose pliers to bend the end of the wire inwards. You have to do this for every ring because the end of the wire is very pokey!
To make a heart ring: Bend the end of the wire the opposite direction.
Bend it again the other way to make a wave-like shape.
Then, bend it again to complete the heart shape. Making these rings is all about creating the shapes are you want it, so the steps are pretty vague!
 |
| DIY heart ring |
Again, bend the end of the ring inwards and wrap around a marker to shape it as a ring.
To make an infinity ring: Start with one inwards bend at the end of the wire.
Loop around the wire to make the shape of an "8."
Here is your infinity shape!
Cut the extra wire off.
Cut a short piece of wire and bend in both ends.
Gently hook on the infinity shapes onto both ends.
 |
| DIY infinity ring |
Super cute infinity ring! This would be a great hand-made gift.
 |
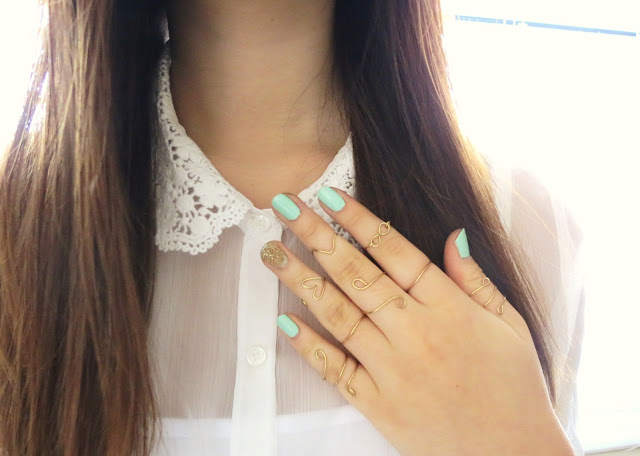
| DIY knuckle rings. You can make all sorts of shapes, personalize them to your taste! |
It's kind of hard to see, but I also made a little ear cuff for my cartilage.
I love my statement pieces, but I think these minimal rings add just enough shine and girly-ness. The only down side is that the rings tend fall off because the wire bends so easily.
Hope you enjoyed this DIY, and let me know if you try it out. :)
p.s. Here are some cute and ready-made options from the web:


37 comments
This is a super cute tutorial!! I always wanted to make my own dainty rings and now I have this to follow along. :) Thank you!!
xo – Sheila
Enter to win Dr. Hauschka Regenerating Eye Cream!
This is so, so cute! You can also do this to do a bracelet, right? So cute <3 Thanks for showing!
This is such a cute idea. you are very pretty!! ;)
omgosh love!! this is so ingenious! love this tutorial. i'm all thumbs but this seems like something even my fumbling fingers could do hahaha! i'm going to attempt to do the heart one :)
wow! you are so creative, you look great
Oh my goodness, what a lovely idea! I'm bookmarking this post for a rainy day! :)
<3 Mandy xx
http://frocksandotherfrivolities.blogspot.com
Omg can't believe you made those, they are so cute!
speaking of DIY, now this one is awesome! i'd much rather do it myself them spend money buying one. thanks for sharing, you're turned out so cute =)
more than the rings, i love ur nail polish!! <3
Thank you for your nice commen. I checked your blog with the result, I like it. I'm your newest follower right now and I hope you follow me back.
What a great post, you have talent ;)
Glamupyourlifestyle.blogspot.de
I`ll definetely try it! Thanks for sharing
Kisses
Hello!
Thanks for your lovely comment on my blog!!!! You are always welcome))
What a nice idea to make the rings at home!!!! Great work!!!
Kisses
Kateryna
http://fashionbycatia.blogspot.it/
Wow so beautyful and easy too!
I like this post really, lovly inspiration.
Love. P
Totally gonna try this , great diy post.
xo Meg
Meghan Silva's Blog
This is amazing! I so want to give this a go! My hands are tiny so I can never find rings that fit, so making my own seems the perfect option! Thanks for sharing! :)
www.ciderwithrosiebee.blogspot.com
Wow love this! my friend was looking for these type of rings the other day but she thought they were a bit too expensive. Definitely gonna share this DIY with her ^_^
x Cammie
aboslutely love this! love the heart one. about to head over to michaels right now :P
http://adventureinheels.blogspot.com/
Oh my gosh that awesome! I'm so going to make some, hopefully they turn our half as cute as yours!
Ah! What a rad post! I've never read your blog before, but I'm so glad I've come across it!
Love the heart ring, girl!
Sarah
www.stylesarah.com
omgosh i am IN LOVE with these rings! i've always wanted to buy one but i can never find any
hope you'll visit back
www.marylee31.blogspot.com
i recently posted about a knuckle ring that i'm loving. your heart ring is so fabulous and unique!
www.insparisian.com
Oh my gosh, I've been wanting to do this for ages and after seeing your tutorial I'm definitely giving it a try! Your rings look incredible:) Have a great weekend Dahye!<3
Your Blog is so cute and you look nice :)
If you want to follow each other, please let me know !
Kisses
this is so cool
i will have to give it a go
brett
cuteeeee and amazing! I should try this. Thankyou for sharing! :)
xx
http://sunnysunartiyo.blogspot.com
It looks so pretty altogether! I really like the ear cuff too:)
I love it!
You're so creative!
would you like follow each other? Let me know =)
http://addictbeiconic.blogspot.com.es/
great idea,pretty
gorgeous! I am in love! I wish I had the patience to do such things!
www.trendinginfashion.blogspot.com
omg so cute!
This is such a cute and useful tutorial! I actually take a jewelry class right now and these would be great for a project!
I Follow you now by the way!
If you have time could you check out/ follow my blog too?
http://www.mybrokeneggshells.com
Great DIY, these look so good! I wish I was as talented as you :)
xx
www.clothesandcamera.com
Love so much this tutorial!
Thanks for visiting my blog!
Now i follow you!
Follow me if you like my blog!
xxx
free your style
absolutely great post! love it!
thanks so much for your sweet comment on my blog - i'm following you now. hope you follow back xx
www.vicariousLA.com
This is such a good idea for a DIY!! I'll have to try making these. Great Post!
Great DIY, can't wait to try it out
Love this DIY! :)
cutenquirky.blogspot.com
Post a Comment